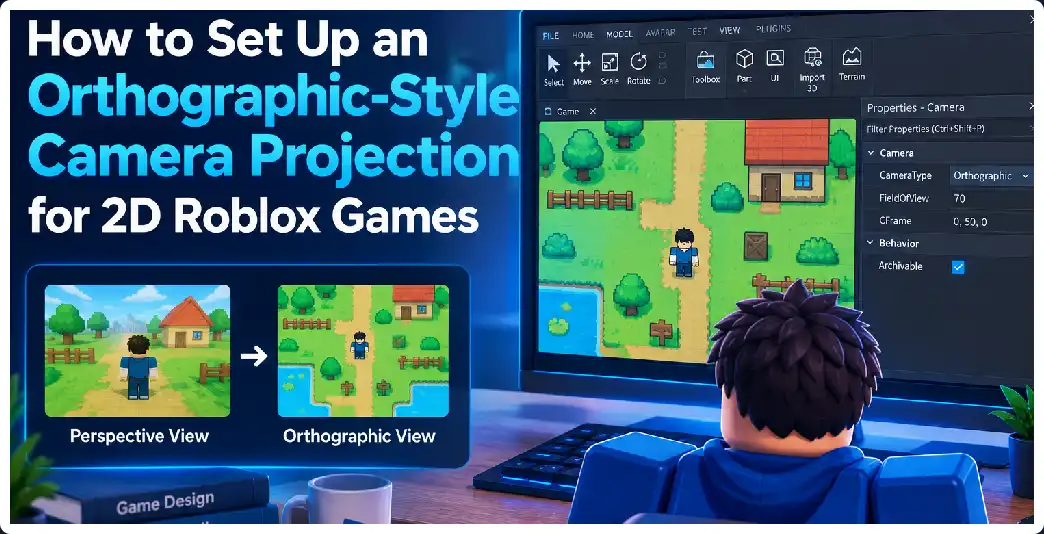
Creating a 2D-style game in Roblox Studio can be a very different experience from building a conventional third-person 3D game. Platformers, side-scrolling adventures, top-down games, puzzle games, arcade experiences, strategy games, and retro-inspired projects often benefit from a camera that remains stable and gives the player a consistent view of the game world.
One of the most commonly requested camera styles for these projects is an orthographic camera.
An orthographic camera normally displays a scene without the traditional perspective effect associated with a conventional 3D camera. In a true orthographic projection, objects do not become visually smaller simply because they are farther away from the camera. Parallel lines can remain parallel, and moving the camera backward does not produce the same perspective zoom effect that occurs with a normal perspective camera.
However, there is an important consideration when working in Roblox Studio: the current standard Roblox Camera API does not provide a direct orthographic projection property. The documented Camera properties include CFrame, CameraType, FieldOfView, FieldOfViewMode, Focus, and ViewportSize, but there is no standard ProjectionMode = Orthographic or OrthographicSize property.
That means you should not expect to find a simple Studio checkbox called “Orthographic Camera.”
Instead, developers creating a 2D-style Roblox game generally build an orthographic-style camera system by taking complete control of the camera, locking its orientation, restricting its movement, and carefully controlling field of view and camera distance.
This guide explains how to do that.
What Is an Orthographic Camera?
An orthographic camera is a camera model in which the apparent size of an object does not change according to its distance from the camera.
Imagine two identical squares.
One square is one hundred studs away.
The other square is two hundred studs away.
With a normal perspective camera, the farther square appears smaller.
With an orthographic projection, the two squares can remain the same apparent size.
This characteristic makes orthographic projection popular for games and applications where spatial layout needs to remain visually consistent.
It is particularly useful for:
- 2D platformers
- Top-down games
- Strategy games
- Puzzle games
- Board-game-style experiences
- Tile-based games
- Retro games
- Tactical games
- Isometric-style games
- Map interfaces
Does Roblox Have a True Orthographic Camera?
This is the first thing a Roblox developer should understand.
The current documented Camera class does not expose a native orthographic projection mode. Its documented field-of-view system is based on perspective viewing, with FieldOfView controlling the observable extent of the 3D world.
Roblox does provide CameraType.Scriptable, which disables the default camera behavior and lets your code control the camera’s CFrame and related properties.
Therefore, when people discuss an “orthographic camera” for Roblox 2D games, they may actually be referring to an orthographic-style camera setup rather than a mathematically true orthographic projection.
This distinction is important because it affects how you design your game.
True Orthographic Projection vs. Orthographic-Style Roblox Camera
There are two different concepts.
True orthographic projection
A rendering projection that removes perspective scaling.
Orthographic-style camera
A carefully controlled perspective camera that is configured to produce a visually 2D result.
For many Roblox 2D games, the second approach is sufficient.
If your game is designed around a flat plane and the camera remains at a fixed orientation and distance, players may experience the game as a 2D environment even though the renderer is still using a perspective camera.
Why Use a Scriptable Camera?
Roblox’s default camera system is designed around conventional player-controlled 3D movement.
For a 2D game, you may not want players freely rotating the camera.
You may want:
- No camera orbit
- No automatic character following
- No camera rotation
- Fixed viewing direction
- Controlled horizontal movement
- Controlled vertical movement
- Fixed zoom
- Screen-centered gameplay
A Scriptable camera allows you to take control of these behaviors. When CameraType is set to Scriptable, Roblox’s default camera scripts stop updating the camera, allowing your own code to control it.
Basic 2D Side-Scrolling Camera
A side-scrolling game is one of the easiest camera styles to implement.
Imagine your game world is arranged along the X and Y axes:
- X = horizontal movement
- Y = vertical movement
- Z = depth
The camera can remain at a fixed Z position and look toward the game plane.
For example:
local Players = game:GetService("Players")

local player = Players.LocalPlayer
local camera = workspace.CurrentCamera

camera.CameraType = Enum.CameraType.Scriptable

local cameraPosition = Vector3.new(0, 10, 40)
local targetPosition = Vector3.new(0, 10, 0)

camera.CFrame = CFrame.lookAt(cameraPosition, targetPosition)
camera.Focus = CFrame.new(targetPosition)
The important parts are the Scriptable camera type and the CFrame used to position and orient the camera. The camera documentation specifically identifies CFrame as the primary property used to position and orient a script-controlled camera.
Why CFrame Matters
A CFrame represents both position and orientation.
This is particularly useful for 2D cameras because you can define exactly where the camera is and what direction it faces.
Roblox provides CFrame.lookAt() for creating a CFrame positioned at one point and oriented toward another.
For example:
local position = Vector3.new(0, 10, 50)
local target = Vector3.new(0, 10, 0)

camera.CFrame = CFrame.lookAt(position, target)
The camera is positioned at the first point and looks toward the second.
Creating a Fixed 2D Camera
If your game does not scroll, you can keep the camera completely stationary.
local camera = workspace.CurrentCamera

camera.CameraType = Enum.CameraType.Scriptable

camera.CFrame = CFrame.lookAt(
    Vector3.new(0, 20, 50),
    Vector3.new(0, 10, 0)
)

camera.Focus = CFrame.new(0, 10, 0)
This is useful for:
- Single-screen puzzle games
- Arcade games
- Board games
- Menu worlds
- Fixed-screen platformers
- Small arenas
Because the camera is Scriptable, Roblox’s normal camera scripts will not move it for you.
Creating a Side-Scrolling Camera
For a side-scroller, you usually want the camera to follow the player’s horizontal position while maintaining the same orientation.
For example:
local RunService = game:GetService("RunService")
local Players = game:GetService("Players")

local player = Players.LocalPlayer
local camera = workspace.CurrentCamera

camera.CameraType = Enum.CameraType.Scriptable

RunService:BindToRenderStep(
    "SideScrollerCamera",
    Enum.RenderPriority.Camera.Value,
    function()
        local character = player.Character

        if not character then
            return
        end

        local root = character:FindFirstChild("HumanoidRootPart")

        if not root then
            return
        end

        local x = root.Position.X

        local cameraPosition = Vector3.new(x, 10, 50)
        local targetPosition = Vector3.new(x, 10, 0)

        camera.CFrame = CFrame.lookAt(
            cameraPosition,
            targetPosition
        )

        camera.Focus = CFrame.new(targetPosition)
    end
)
This creates a camera that follows the player horizontally while maintaining a fixed viewing direction.
The camera remains controlled by your code rather than by the standard Roblox camera behavior.
Why Update the Camera Every Frame?
A Scriptable camera does not automatically follow your character.
If you want it to track a moving character, you need to update the camera yourself.
The official camera documentation recommends updating Focus when using a Scriptable camera because the engine uses the focus area for certain visual processing decisions.
A render-step update is useful because camera movement needs to stay synchronized with the rendered frame.
Creating a Top-Down 2D Game
You can also create a top-down 2D-style game.
In this setup, the camera looks downward toward the game plane.
For example:
local camera = workspace.CurrentCamera

camera.CameraType = Enum.CameraType.Scriptable

local target = Vector3.new(0, 0, 0)
local position = Vector3.new(0, 100, 0)

camera.CFrame = CFrame.lookAt(
    position,
    target
)

camera.Focus = CFrame.new(target)
This produces a top-down viewing arrangement.
However, there is a subtle issue.
If the camera is positioned exactly above the target and you use the default world-up direction, you should think carefully about the camera’s orientation because a look-at camera needs a stable concept of “up.”
For more complex top-down cameras, you can provide an explicit up direction through CFrame.lookAt().
Isometric-Style 2D Games
Many games described as “2D” actually use an isometric presentation.
An isometric-style camera looks diagonally toward the world instead of directly from the front or directly from above.
Roblox’s own camera-learning materials include side-scrolling and isometric camera scenarios as examples of custom camera behavior.
An isometric camera can be built by positioning the Scriptable camera at a diagonal angle and maintaining that orientation while moving the camera across the world.
The important difference is that isometric-style presentation is not the same thing as true orthographic projection.
Using FieldOfView
Because Roblox does not currently expose an orthographic projection property, field of view becomes important when creating an orthographic-style presentation.
Camera.FieldOfView controls the visible vertical field of view and is constrained by Roblox’s documented limits. The horizontal view is related to the viewport’s aspect ratio.
A narrower field of view reduces the amount of perspective distortion.
However, reducing FOV does not convert a perspective camera into a mathematically orthographic camera.
That distinction should always be remembered.
Why a Low FOV Can Help
A narrow FOV can make a fixed camera feel flatter.
Imagine a platformer where all gameplay takes place on one plane.
If the camera remains far away and the FOV is relatively narrow, changes in depth become less visually obvious.
The result can feel closer to a 2D game.
However, there will still be perspective.
Objects at different distances can still change apparent size.
Camera Distance and FOV
Camera distance and field of view work together.
If you move the camera farther away while narrowing the FOV, you can maintain a similar framing.
This can be useful when creating a 2D-style environment.
For example, you might place the camera 100 studs away from the gameplay plane and use a narrow FOV.
The exact values depend on the size of your world and how much of the level you want visible.
Avoiding Camera Zoom
A 2D game usually benefits from predictable framing.
Avoid allowing the player’s normal mouse wheel or camera controls to change the view unless zooming is deliberately part of your game.
Because the camera is Scriptable, you can choose exactly how zoom should work.
You could:
- Disable zoom completely
- Create fixed zoom levels
- Add controlled camera zoom
- Zoom during special gameplay events
- Smoothly transition between zoom levels
Creating Controlled Zoom
Suppose you want three zoom levels:
Zoom 1 = close
Zoom 2 = medium
Zoom 3 = wide
Instead of letting the default camera zoom freely, store camera distance or FOV values and change them through your own input system.
You can use TweenService for smooth transitions.
The camera documentation also demonstrates tweening a Scriptable camera’s CFrame for smooth camera movement.
Locking the Camera to the Player’s Plane
One common mistake is allowing the player’s depth coordinate to influence the camera.
In a 2D side-scroller, you may want the character’s X position to move the camera while completely ignoring Z.
For example:
local x = root.Position.X

local cameraPosition = Vector3.new(
    x,
    10,
    50
)
Here, the camera’s Z position remains fixed.
This prevents accidental depth movement.
Adding Camera Boundaries
Large 2D games need camera limits.
Suppose your level extends from:
X = -500
to:
X = 500
You can clamp the camera position.
local minX = -500
local maxX = 500

local x = math.clamp(
    root.Position.X,
    minX,
    maxX
)
This prevents the camera from showing outside the intended level.
Why Camera Boundaries Matter
Without boundaries, the player may reach the end of the level while the camera continues moving.
This can reveal:
- Empty terrain
- Unfinished scenery
- Hidden objects
- Level boundaries
- Development areas
Camera limits are therefore both a gameplay and presentation feature.
Creating a Dead Zone
Instead of making the camera follow the player immediately, create a horizontal dead zone.
For example, allow the player to move within a central area of the screen.
Only when the player approaches the edge does the camera begin moving.
This creates a smoother platforming experience.
Conceptually:
|------------------------|
|                        |
|    DEAD ZONE           |
|      PLAYER            |
|                        |
|------------------------|
The camera then follows only when necessary.
Smoothing Camera Movement
Instant camera movement can feel harsh.
You can interpolate the camera position.
A simple technique is to use Lerp().
local targetCFrame = CFrame.lookAt(
    targetCameraPosition,
    targetPosition
)

camera.CFrame = camera.CFrame:Lerp(
    targetCFrame,
    0.1
)
The CFrame API supports interpolation through CFrame:Lerp().
This can create smoother camera movement.
Avoiding Excessive Camera Smoothing
Too much smoothing can create a delay between player movement and camera movement.
That can be especially problematic in platformers where precise positioning matters.
Use enough smoothing to remove visual harshness without making the camera feel disconnected from the character.
Designing the World for 2D
Camera configuration is only one part of creating a 2D Roblox game.
Your environment should also support the camera style.
For a side-scroller, keep important gameplay geometry aligned with a primary plane.
For example:
X = gameplay width
Y = gameplay height
Z = controlled depth
You can use depth for layering while preventing players from freely moving through it.
Locking Player Depth
You may need to prevent the character from moving forward and backward.
The exact implementation depends on your controller, but the goal is usually to keep the character’s depth coordinate constant.
This ensures that the player remains inside the 2D gameplay plane.
Camera and UI Are Different Systems
A common mistake is confusing a 2D world with a 2D interface.
Roblox’s UI system renders on-screen graphical interface objects separately from 3D world objects. ScreenGui containers hold on-screen UI such as frames, labels, buttons, and images.
Therefore, a 2D game can be built in two fundamentally different ways.
World-space 2D
Use Parts or MeshParts arranged in a 3D world and view them with a controlled camera.
Screen-space 2D
Use GUI objects and images that are rendered directly on the player’s screen.
These approaches have different advantages.
When to Use World-Space 2D
World-space 2D is useful when you want:
- 3D physics
- Parts
- Collision
- Lighting
- Shadows
- 3D character models
- World-space effects
It can create a 2D game that still benefits from Roblox’s 3D engine.
When to Use Screen-Space 2D
Screen-space UI is useful for:
- Card games
- Menus
- Board-game interfaces
- Puzzle interfaces
- HUD-driven experiences
- Completely flat games
Roblox provides extensive UI objects for this purpose.
Supporting Different Screen Sizes
A 2D game needs to work on different displays.
A desktop monitor might have a wide landscape aspect ratio.
A phone may be much narrower.
A tablet can fall somewhere between them.
Roblox provides a Device Emulator in Studio so developers can test how experiences appear on different device sizes.
This is particularly important for a 2D game because the visible game area can change substantially between aspect ratios.
Maintaining the Correct Aspect Ratio
Suppose your game is designed around a 16:9 play area.
A player on a different aspect ratio may see:
- More horizontal space
- Less horizontal space
- More vertical space
- Less vertical space
You need to decide what should happen.
Possible strategies include:
- Keep the vertical view fixed.
- Keep the horizontal view fixed.
- Add letterboxing.
- Dynamically adjust camera framing.
- Use a safe gameplay region.
- Design levels to tolerate different view sizes.
Using UI Aspect Constraints
For screen-space interfaces, Roblox provides aspect-ratio constraints that can preserve the intended proportions of GUI objects.
This is useful for HUD elements that should remain proportional.
However, GUI aspect constraints do not turn a world-space perspective camera into an orthographic camera.
They solve a different problem.
Handling Mobile Devices
A 2D game should be tested on phones and tablets as well as computers.
Touch controls may need to be positioned differently.
Buttons should remain large enough to interact with.
Important gameplay elements should not be hidden by interface components.
The camera itself should maintain predictable framing.
Testing Camera Framing
Use Studio’s device emulation features to test different screen configurations.
Check:
- Character visibility
- Platform visibility
- Level boundaries
- UI overlap
- Text readability
- Camera centering
- Gameplay area
Roblox specifically recommends testing UI across different screen sizes because Studio’s viewport dimensions may not represent the devices used by players.
Common Problem: “I Cannot Find OrthographicSize”
You will not find a standard OrthographicSize property on Roblox’s current Camera class.
The documented Camera API does not list such a property.
Instead, use:
- CameraType
- CFrame
- FieldOfView
- Camera position
- Camera movement logic
to create the visual behavior your game needs.
Common Problem: Objects Still Change Size
If objects at different depths change apparent size, remember that you are still using perspective projection.
A narrow FOV can reduce the visual effect but does not eliminate perspective.
The only way to obtain mathematically true orthographic rendering would require an engine-level projection capability that is not exposed through the standard Roblox Camera API.
Common Problem: Camera Moves by Itself
Make sure you set:
camera.CameraType = Enum.CameraType.Scriptable
Otherwise, Roblox’s standard camera behavior may continue to control the camera.
Common Problem: Camera Does Not Follow the Player
A Scriptable camera does not automatically follow the player’s character.
Your script needs to calculate the camera’s position.
Use the character’s HumanoidRootPart or another appropriate target.
Common Problem: Lighting Looks Strange
Remember to update Camera.Focus when using a Scriptable camera.
The Focus property tells Roblox which area around the camera should receive priority for certain visual processing.
Recommended Basic Architecture
A clean project structure could be:
StarterPlayer
└── StarterPlayerScripts
    └── CameraController
The LocalScript controls the player’s camera.
You can separate additional systems into:
CameraController
CameraBounds
CameraZoom
CameraShake
PlayerController
InputController
This becomes easier to maintain as the game grows.
Final Recommended Workflow
For a Roblox 2D-style game:
- Decide whether you need world-space or screen-space 2D.
- Build the gameplay plane.
- Add a LocalScript for camera control.
- Set
CameraTypetoScriptable. - Position the camera.
- Use
CFrame.lookAt()to orient it. - Keep the viewing direction fixed.
- Restrict camera movement to the desired axis.
- Use a controlled FOV.
- Add camera boundaries.
- Add smoothing if appropriate.
- Test different screen sizes.
- Test mobile and desktop.
- Check UI separately.
- Optimize the camera before publishing.
Frequently Asked Questions
Does Roblox Studio have a true orthographic camera?
The current standard Camera API does not expose a native orthographic projection mode. The documented properties are based around a conventional perspective camera system.
Can I create a 2D game in Roblox?
Yes. You can build a 2D-style experience using world-space objects and a controlled camera, or build a screen-space experience primarily using Roblox UI.
What CameraType should I use?
Enum.CameraType.Scriptable is the appropriate starting point when you need complete control over camera behavior.
Does Scriptable make the camera orthographic?
No. Scriptable gives your code control over the camera; it does not change the projection type.
Can low FOV create an orthographic camera?
No. A low FOV can make a perspective camera appear flatter, but it remains perspective.
What does CFrame do?
CFrame controls the camera’s position and orientation. It is the primary mechanism for positioning a Scriptable camera.
What is CFrame.lookAt()?
It creates a CFrame positioned at one point and oriented toward another point.
Should I update Focus?
Yes. Roblox recommends updating Focus when controlling a Scriptable camera because Focus helps the engine prioritize visual processing around the relevant area.
Can I make a side-scrolling game?
Yes. Keep one axis fixed and allow the camera to follow the player along the desired gameplay axis.
Can I make a top-down game?
Yes. Position the camera above the game plane and orient it toward the gameplay area.
Can I make an isometric game?
Yes. Use a Scriptable camera positioned diagonally toward the game world.
Why does my game still look 3D?
Because the Roblox Camera remains perspective-based. Locking the camera and using a narrow FOV creates a 2D-style presentation but does not change the underlying projection.
How do I stop the camera from showing outside the level?
Clamp the camera position using minimum and maximum boundaries.
Should I use camera smoothing?
It depends on the game. Smooth movement can look better, but excessive smoothing can make controls feel delayed.
How do I test my 2D game on phones?
Use Studio’s device emulation features to test different screen sizes and aspect ratios.
Conclusion
Setting up an “orthographic camera” for a Roblox 2D game requires an important adjustment in expectations. Roblox’s current standard Camera API does not provide a native orthographic projection switch.
Instead, the practical solution is to build an orthographic-style camera.
Set the camera to Scriptable, control its CFrame, keep its orientation stable, restrict movement to the appropriate gameplay axis, use a carefully selected field of view, and add camera boundaries.
For a side-scrolling game, the camera can follow the player horizontally.
For a top-down game, it can remain above the gameplay plane.
For an isometric game, it can maintain a fixed diagonal orientation.
The result can provide a strong 2D game experience while still taking advantage of Roblox’s 3D engine.
The most important thing is to understand the difference between true orthographic projection and an orthographic-style camera setup. Once that distinction is clear, you can design your camera system around the actual capabilities of Roblox Studio instead of searching for a camera property that is not currently exposed.